RtcTest
The easy time measurement sometimes really missing from an Arduino based project, because the microcontrollers don’t support this functionality. Once you power off your project the preset date and time data get lost. If you would like to keep it, you need an external Real Time Clock (RTC) module. Fortunately it is pretty easy to connect a RTC to your project. This article is about to describe how this can be done.
Parts
First you need a microcontroller. I used a really cheap Arduino Nano board. Besides that you need an RTC chip. I used two breakout boards, which contain such a chip. The first module is a DS3231 Raspberry Pi RTC Board Real Time Clock Module for Arduino the seconds is DS3231 High Precision Real-Time Clock Module. Both modules work with the same DS3231 chip and both of them are 3.3 volt compliant.
Wiring
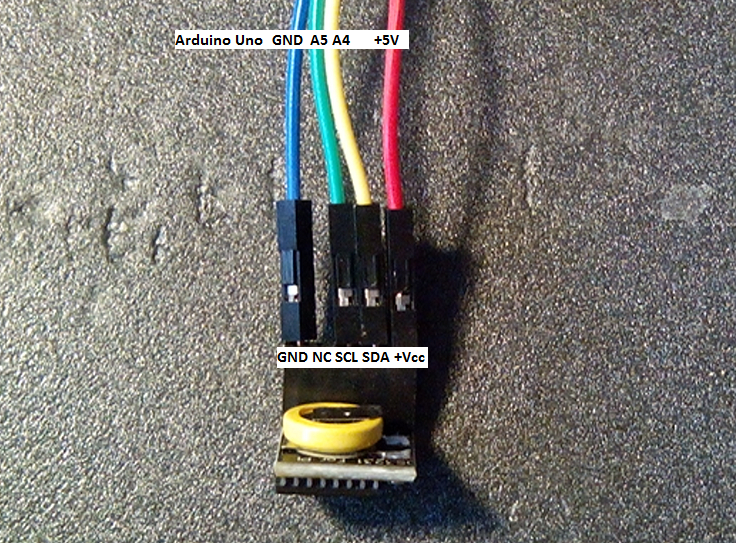
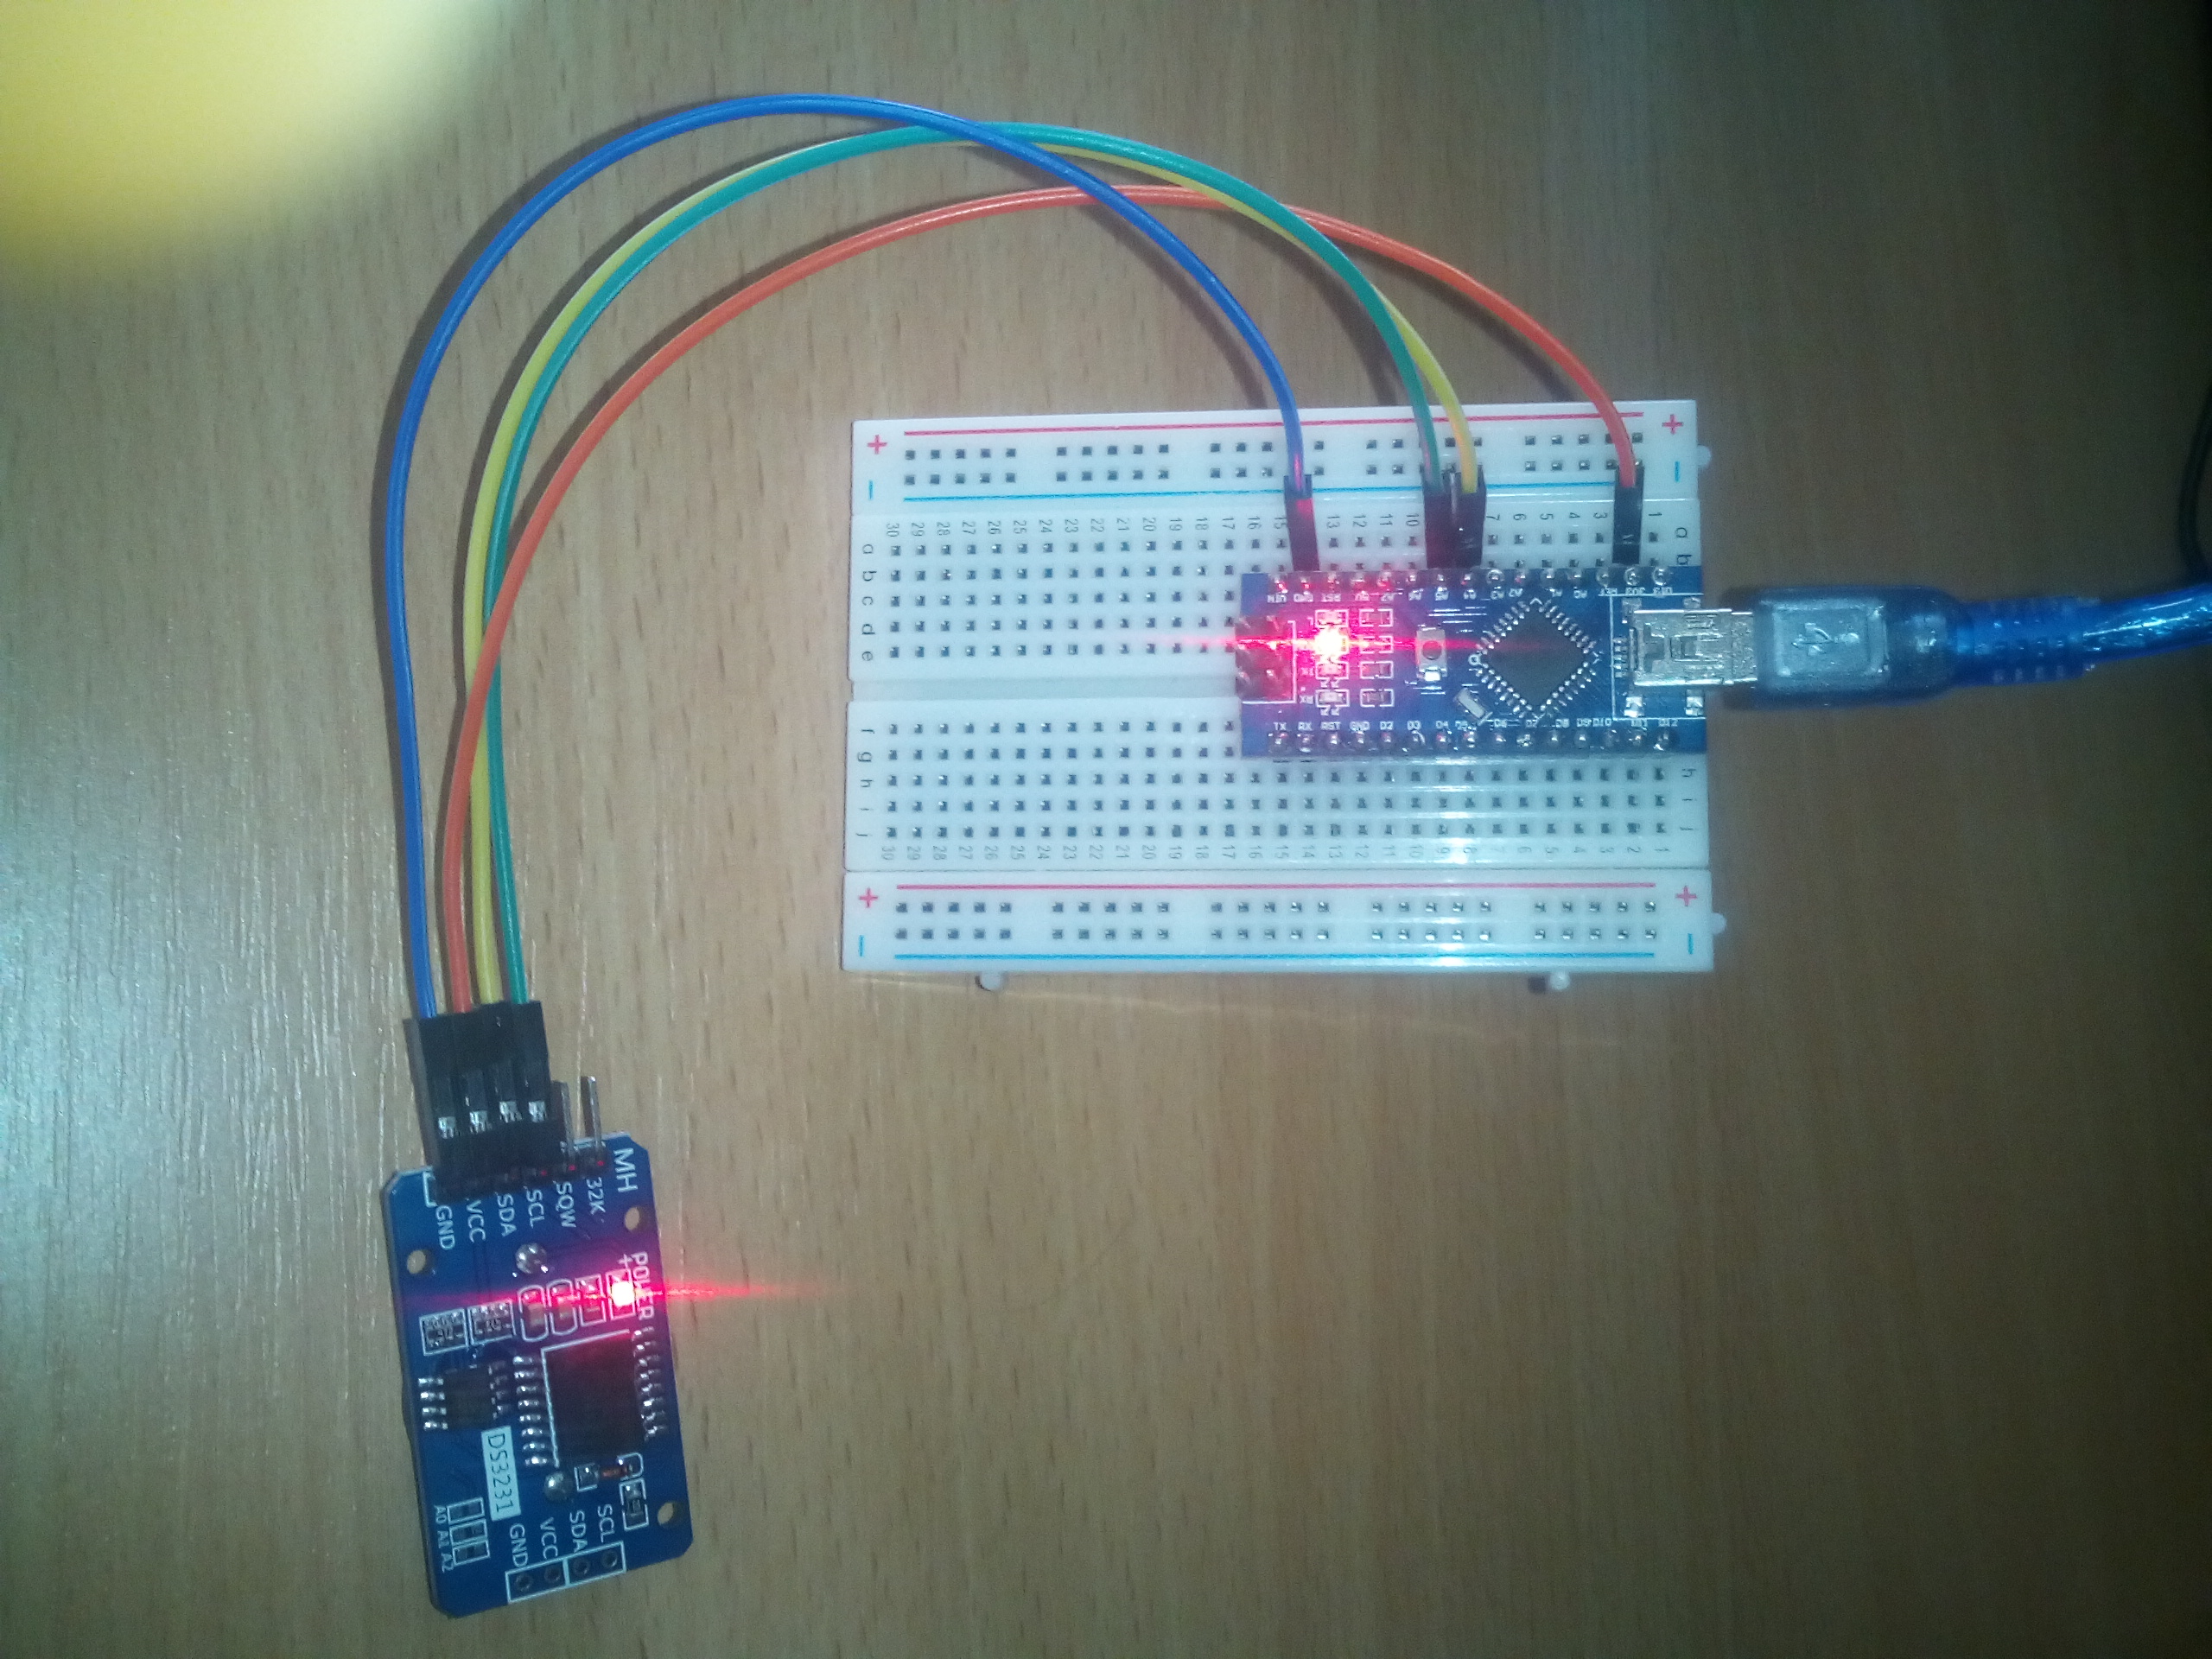
It is pretty easy to connect the RTC module breakout boards to the Arduino microcontroller board. All you have to do is to connect GND to GND, VCC to the 3.3 volt pin. The I2C SDA line to the A4 pin and the I2C SCL line to the A5 pin. This pinout can be seen on the following picture:

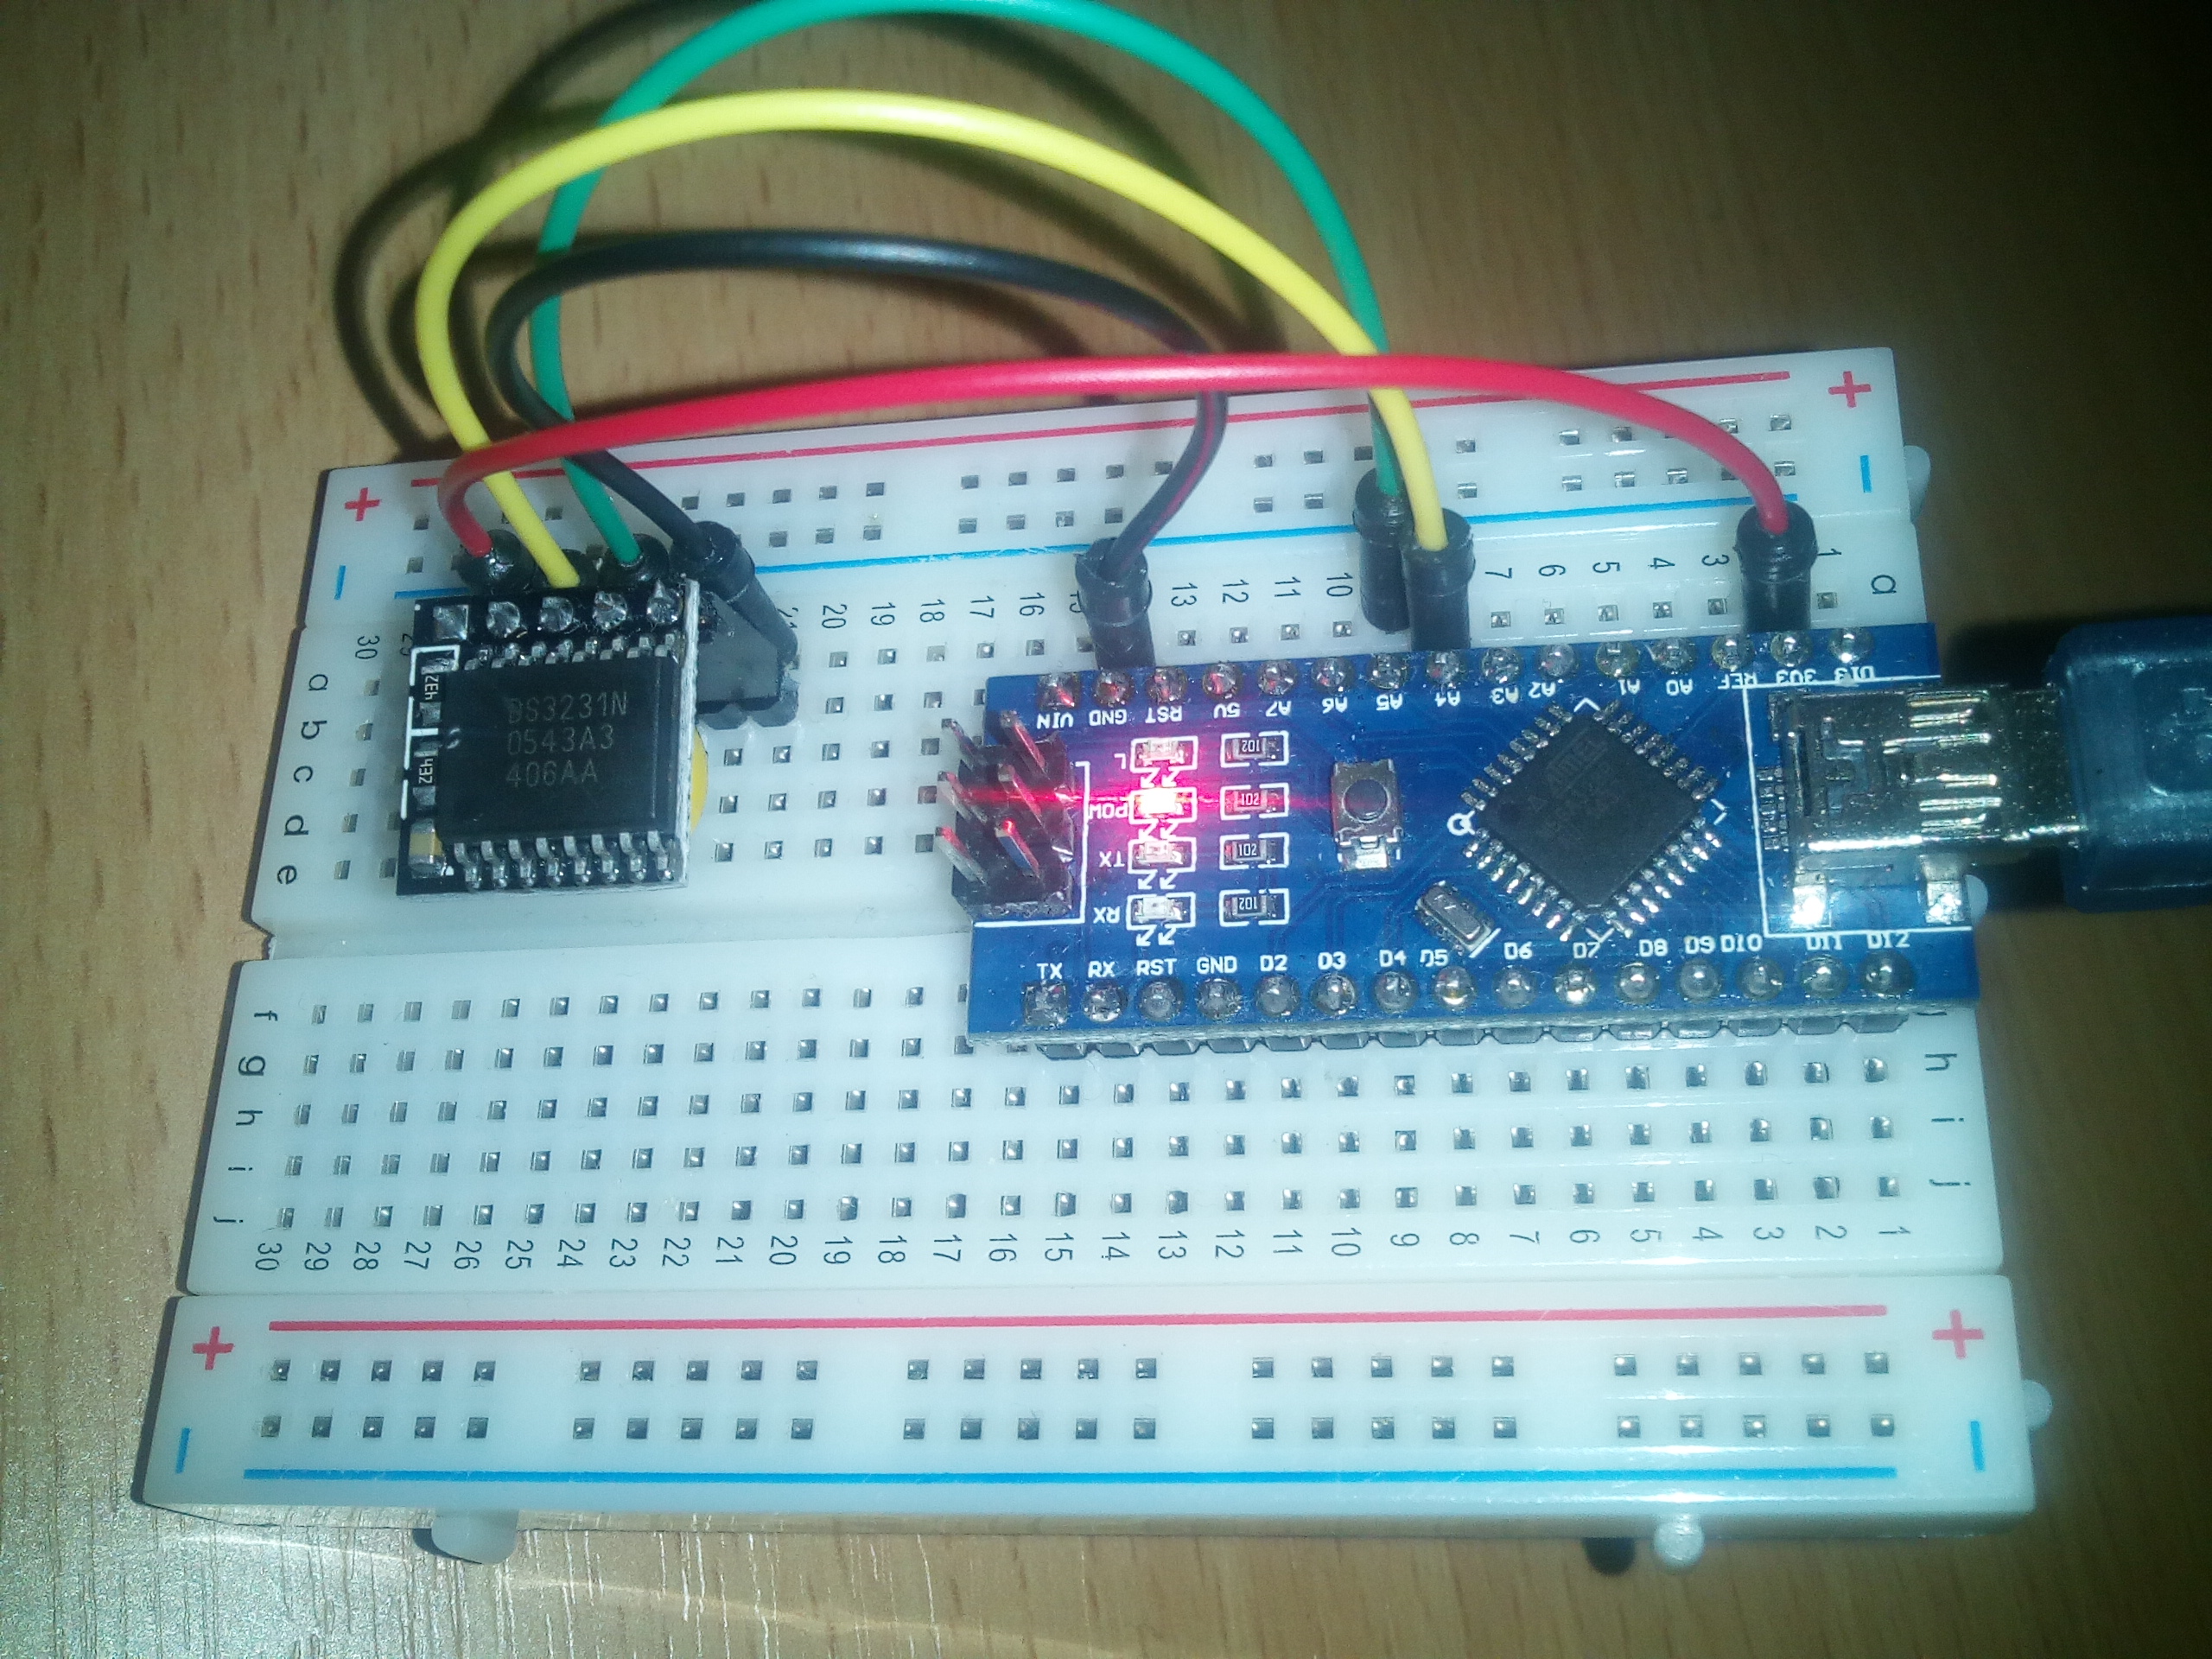
In real life the project will look similar on a solderless breadboard:


Code
The code was written in Arduino IDE. At first the required DS3231 Real Time Clock library has to be installed. The downloaded zip file contains the library files. Open the DS3231_TEST folder in the zip archive and find the files DS3231.cpp, DS3231.h, keywords.txt and Readme.txt. Copy all of these files into a new folder in your Arduino libraries folder. Rename this folder to DS3231 and you are done.
The sample code which can be found in the RtcTest.ino file contains two features:
- Set the right time and date
- Print out the current time and date to the Serial Monitor
The first feature is in the setup() method:
1 | //Setup the time - Use the ONLY once for initialization!!! |
Please note that this code snippet is commented out by default. If you would like to use it, just comment it out and set the right date and time! Upload it to your Arduino microcontroller. Now you set the values. Comment it back again and upload the modified sketch once more. After this you are all set and your board can retrieve the current time from the RTC module.
The second feature prints out the actual time and date. It is implemented in the readTime() method. You can give it a try by disconnecting your Arduino from the power source. Once you reconnect it, you should see the right, preserved values on Serial Monitor.

If your module forgets the values and resets itself, you can set the correct values once more like this after a battery replacement.
For your convinience I created a sketch on Codebender, which makes pretty easy to try out the sample code by yourself:
Repository
The RtcTest GitHub repository contains all project related materials.

